Friday, August 29, 2014

Hanging Book Pocket – An Organizational Project

School is in session and since I only have two boys to entertain during the day, my project list is growing! There are so many things I would love to work on but organization is at the top of my list. I have been searching for the best way to store children’s books on a small budget. Bookcases are expensive and also a climbing temptation, plus we don’t have a lot of empty wall space in our living room. But I think I may have found my solution! 

While looking at ideas for car organization, I happened to come across a Pin for a book holder for the backseat and it inspired me to create this hanging book holder to use on our banister. So off I went into my craft closet to look for the supplies I needed.

1. I found the valance material I had removed from the windows of our house when we first moved in. (Having a minor hording problem has its benefits) It was finished at 12” and a nice sturdy cotton. I cut and hemmed it at 30” long.


2. For the main pockets I used the left over material from the storage boxes in my Laundry Room Makeover. I cut each panel a little wider than the backing so it would give room for more books. Each panel was approximately 10” x 14”.

3. I attached the panels to the backing with a simple top stitch (hopefully you can sew in a straight line, if not, you can make yours a little wavy like mine)


4. I made the ties by cutting four strips and sewing two edges closed on the wrong side

5. I used a pencil to assist in turning the ties to the right side. I ironed them flat and folded under the remaining raw edge

6. I attached two ties to each corner on the top of the backing material – since this was originally a curtain valance it had rod pockets on top and bottom, so I stuffed the ends of my ties into the pockets and sewed it with a zig-zag stitch for add strength
7. I ended up using four panels but the fourth one I made smaller to match the reveal size of each pocket, approximately 7.5” Next time I think I will make the panels a little shorter and possibly add more

After it was all done, I tied it on our banister and filled it with books. It is a nice simple solution to our storage problem. I think I need to make two or three more to hold all of the books we own but this is a great start. Total I spent approximately 2-3 hours on the project and ZERO dollars. Functional and Free. The best combination! 

I hope everyone has a safe and fun holiday weekend!
Until Next Time, 
Sonja


Friday, August 22, 2014

Stevia Select: Chocolate Raspberry Liquid Stevia Product Review

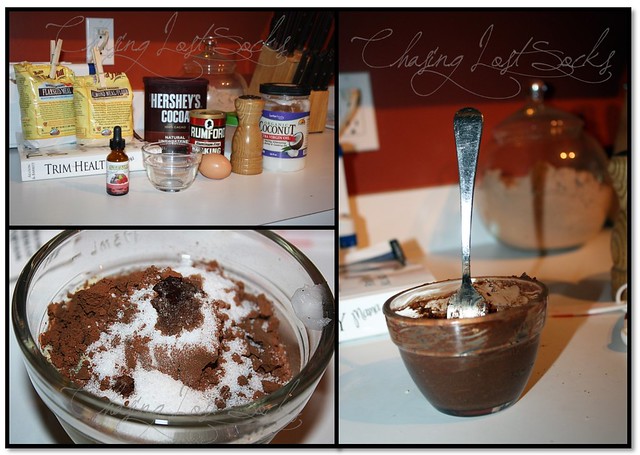
As most of you know I began a sugar free lifestyle back in March when I started Trim Healthy Mama, (affiliate) it has been life changing and I am loving it! (I will be sharing that journey with you soon!) When I started my search for sugar alternatives I had read that quality Stevia could be difficult to find. I stumbled upon Stevia Select while browsing Amazon.com and after reading all the positive reviews I thought I would give it a try.

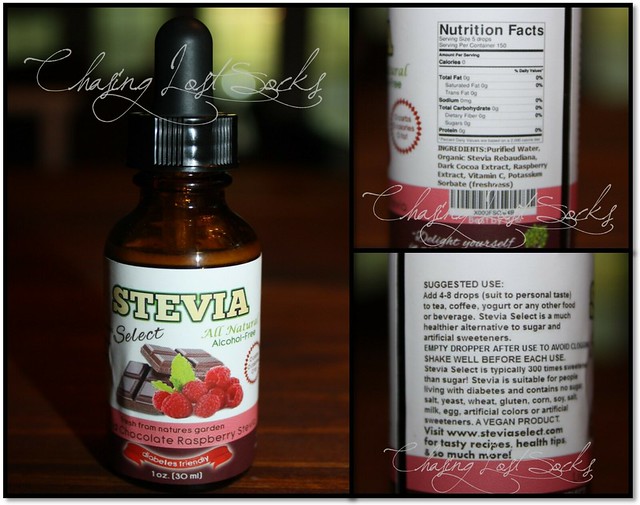
I first ordered the 100% Pure Stevia Powder and was delighted to discover that not only did it taste great, it had none of the bitter after taste that I was warned about from other products. Since then I was able to be in contact with this family owned small business and I received a bottle of their Liquid Stevia in the Chocolate Raspberry flavor to review.
Stevia Selectpics
I was a little disenchanted at first since I normally do not like the blend of chocolate and fruit flavors (apart from the occasional chocolate covered strawberry). However, I was pleasantly surprised by this little bottle of Stevia. It has nice delicate raspberry flavor that isn't overwhelming.

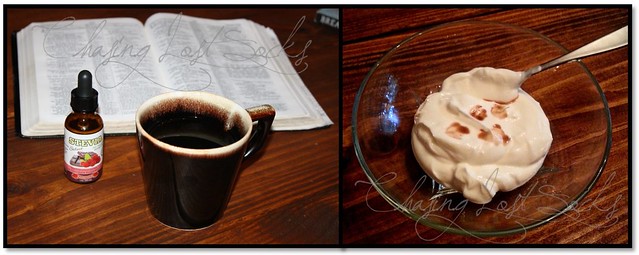
I first tried it in a serving of plain Greek yogurt and it took about 10-12 drops to get to the sweetness level that I like but it blended in smooth and creamy. It left the best after taste, the kind that leaves you wanting just a little bit more.
Stevia Selectpics2
After that I used it in a cup of black coffee, and the warm drink really brought out the flavors. I didn't have to use as much, just 6-8 drops, and could really taste the fullness of the flavors better than in the yogurt. It was also just as yummy in a cup of hot Oolong tea {for those of you on THM: Chocolate Raspberry Shrinker! Yummy!} I discovered that, as the bottle states, it really does need a good shake between each use and the dropper works best when emptied completely after using to prevent clogging.

The real test was my beloved Chocolate Muffin in a Mug. I followed the recipe in the book and added 6-8 drops of the Chocolate Raspberry Liquid Stevia.
Stevia Selectpics3
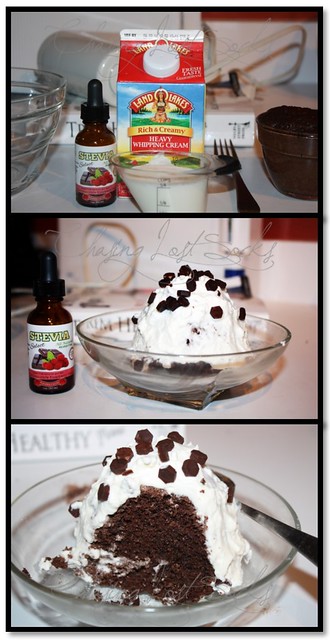
Then I made a Chocolate Raspberry Whip to spread over my muffin. 
Because who doesn't love losing weight eating whip cream smothered chocolate muffins!?
I topped it with Skinny Chocolate chips and it was delicious! 
Stevia Selectpics4

I am very excited to have this product in my pantry and I cannot wait to try the other flavors Stevia Select has to offer.

Check out their website to learn more about this great company and order your Stevia today!

Until Next Time, 

Sonja


Friday, August 1, 2014

Magic Fingers: a shoe tying miracle.

My first born will be starting Kindergarten in a couple weeks. It is hard to believe how fast the past five years have gone. We are so very blessed by our wonderful boys. I have been watching videos of him when he was a baby and young toddler. Talk about setting myself up for emotional meltdowns! So I thought I'd better take a break and share this small miracle we experienced yesterday.

This summer has welcomed lots of new challenges, one being teaching the boys how to tie their own shoes. After weeks of working with him on the traditional, bunnies, holes, and trees method I gave up and searched for a new way. 

I stumbled upon this video and it was a miracle.


After taking a moment to master this technique myself I showed it to them and in less than 10 minutes my, soon to be, Kindergartener was tying his own shoes!! Miracles do happen!

Now the next day has come around and a nights sleep has caused some set backs and like everything else, it still takes practice to master this new skill but overall this method worked so well I had to share.

He is so proud of himself and I am very excited to find something that works especially since I will be teaching this lesson three more times (very soon as fast as time is flying by these days)!


Now back to watching home videos... bring on the tissues!

Until next time,
Sonja